
SILQ is certified by Xero and the SILQ app can be found on the Xero Marketplace. In order to be certified we worked with Xero to ensure our Sync functionality works accurately and within the Xero framework, keeping you efficient without anything to worry about.
Our integration is a one way integration. This means that SILQ only sends up Invoices, Receipts & Expenses. Information from Xero does not sync back to SILQ.
Below are the steps to configure the integration.
Step 1: Configure system settings
- Navigate to the cog icon in the menu in the top right which will direct you to the System Settings window

- Click on Integrations
- Select Xero
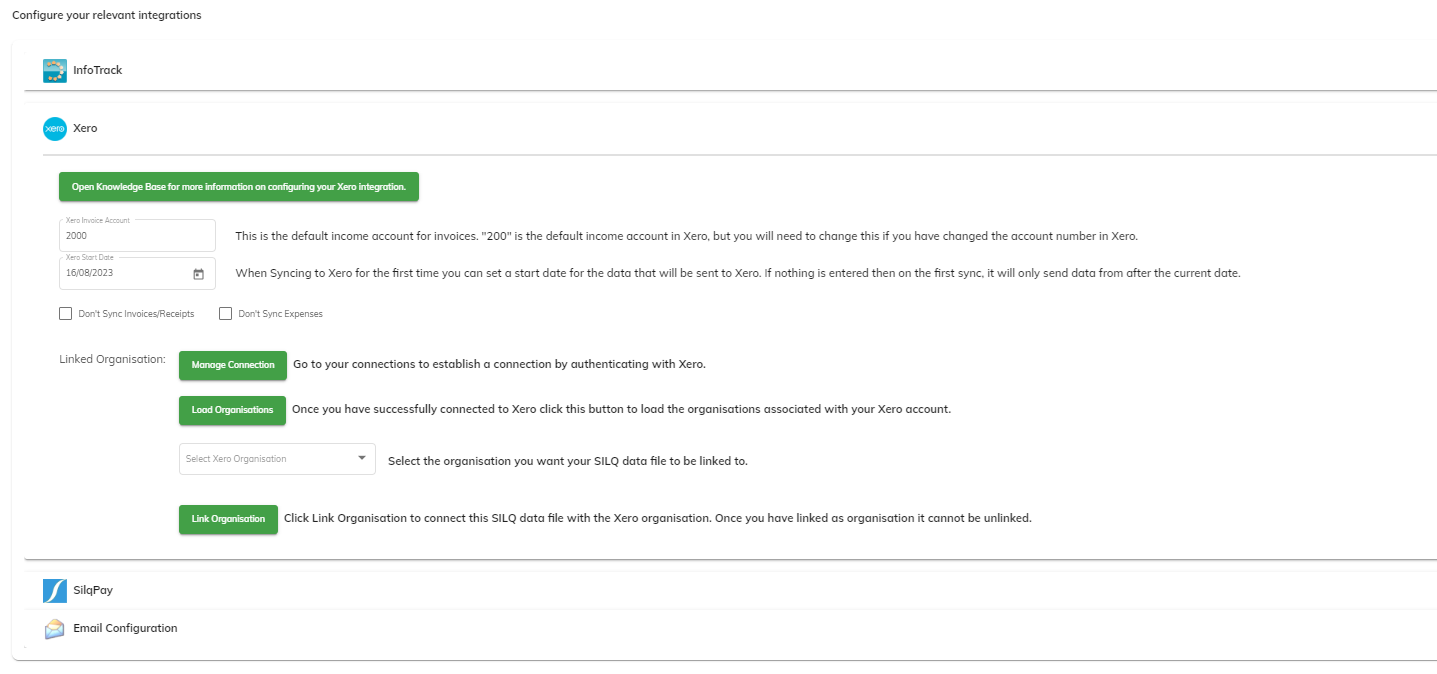
- The Default Invoice Account is normally 200. If you are unsure what it is, that means you do not need to change it from 200 unless told otherwise by your accountant.
- The Xero Start Date determines when SILQ begins syncing up data. Only data entered on or after this date will be synced. If left blank, it will sync to Xero only data created within SILQ after the first sync occurred and no historical data.
- You can untick either box to control if Invoices/Receipts or Expenses if you don't want them to sync to Xero.
- Click on Manage Connection
- A pop-up will appear asking you to provide permission for your organisation. You will need to choose the organisation you want to link to from the dropdown (if you have more than one Xero account).
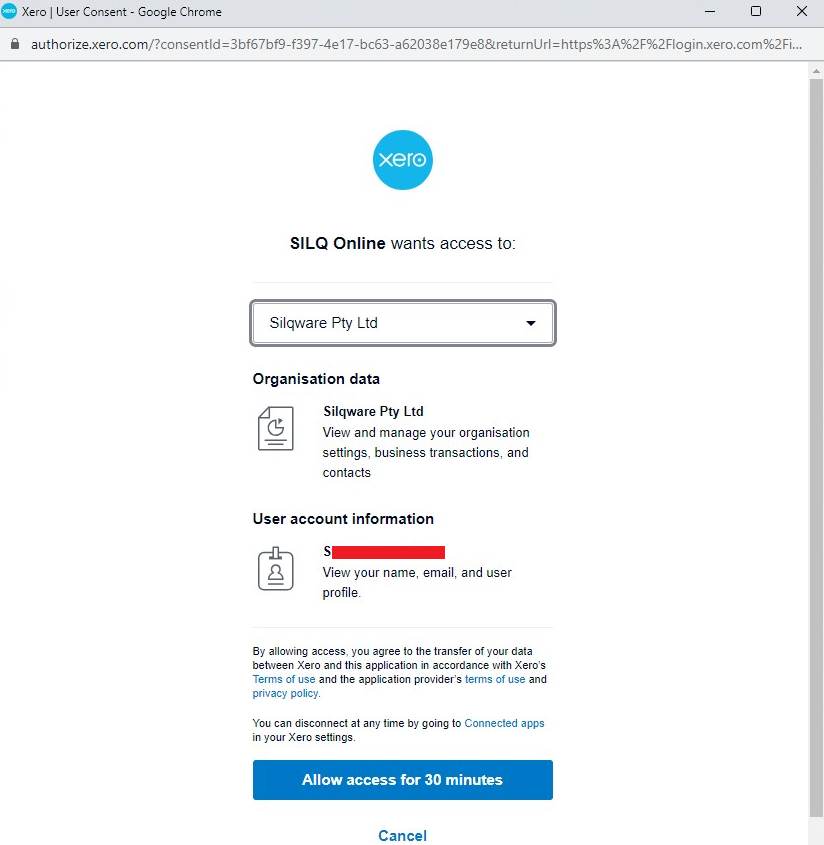
- When you have chosen your organisation, you are able to click on the blue allow access button.
- Once you have connected to Xero, click the "Load Organisation" button to load the organisation list, then select the organisation, you want to connect to and click "Link Organisation"
Step 2: Link accounts to Xero
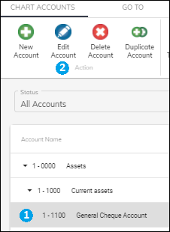
- Navigate to the Accounts tab at the top of your screen
- Click on Chart of Accounts

- Highlight an account you wish to link
- Click on Edit Account
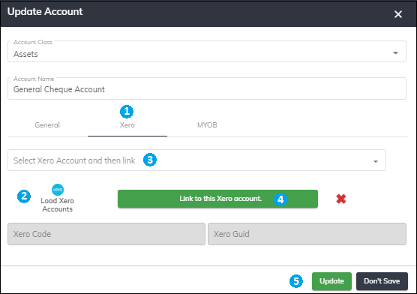
- Navigate to the Xero tab
- Click the Load Xero Accounts This will populate the drop-down menu in step 3. Note: The first time you push this button, it will ask you to log into Xero. Once that is done, you will need to push it again to populate the list.
- Select the Xero account you wish to link to this account
- Push the Link to this Xero account This will populate the Xero Code and Xero Guid fields. Note: The Xero account must have an ID. If it does not, you will need to give it one before linking.
- Click Update to finish the process.
The minimum required linked accounts:
- Business Account
- Accounts Receivable
- Disbursement Income
- Disbursement
Disbursement Income and Disbursement don’t exist within Xero by default. If your account is new, you will need to create them.
Step 3: Syncing
Once all the appropriate accounts are linked, you can sync to Xero by navigating back to the Chart of Accounts screen and clicking the Sync to Xero button.

At the conclusion of the sync, a screen will appear. If the screen is empty, the sync has been successful and there are no errors. If there is any information on that screen however, one or more errors have occurred.
Sometimes the errors are simple to resolve, such as a contact missing an email address etc. Others may be a bit more complex.
The first step in resolving an error is to view the relevant information in the logs which can be found by going to:
Reports, then clicking on Audit Logs.
Under the Show What Dropdown, choose - View Xero Logs
These logs provide you with any errors that have occurred and you are able to work through each error individually to resolve the issue.
If you receive an error that you’re unsure how to deal with, please contact the support desk (1300 55 66 89) and they will assist.
Once items are synced to Xero, they cannot be deleted, only reversed. Please make sure that you have corrected any errors before initiating a sync.