View & Create Time Entries in the Outlook Add-In
Create time entries direct from your Outlook Add-In.
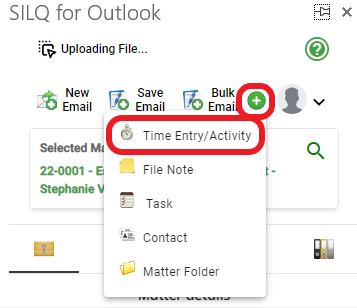
The quickest way to add your entries when working through your emails is to use the Outlook Add-In to enter that time.
To do this:
1. Choose the relevant matter
2. Click on the green + icon
3. Click on New Time Entry / Activity

3. Type in the time entry information as you would on the Online Version of SILQ
4. Click Save. The time entry is now saved in SILQ to the matter you selected in both the Desktop and the Online Version
To view all existing time entries on this particular matter, you can do so using the below icon:

The colours mean:
a. Black - Uninvoiced
b. Blue - Invoiced
c. Orange - Written Off
Find more information about how to use the Outlook Add-In here.
