
Connecting your SharePoint
Please note, the below assumes you have already created a SharePoint account and saved your documents (if you have existing ones) to that account. If you have not done his step as yet, please follow the instructions you receive from Microsoft to do so.
To connect to SharePoint, follow the below steps:
- Go to login.microsoftonline.com
- If you are already logged into an account on the browser you are using, please make sure it is the account you would like to connect to SILQ.
- If you are not logged in or logged into a different account, please logout and then login to the account you want to connect to SILQ.
- When logged into SharePoint, in the top right hand corner, please click on the initials and confirm that it is referencing the email address you would like to connect to SILQ. If it is not, please repeat step 3.
- Back in SILQ, navigate to system settings which can be found by clicking the cog icon in the right hand corner.

- Click on the templates tab on the left hand side (green bar)
- Enter in the SharePoint site domain. e.g. myfirm.sharepoint.com. This is mandatory.
- Optionally enter the subsite if you are not using the default site.
- You can also optionally choose which folder you would like to use. Otherwise it will start creating folders in the root folder.

- Once done, press save.
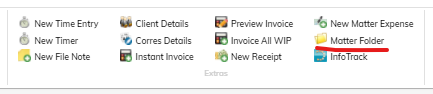
- Navigate to the Matters screen and click on the Matter Folder button. This will attempt to open up the selected matter’s folder in SharePoint.
- At this point a pop-up should appear. Please note, you may have pop-ups blocked on your browser. If it does not appear, please see the below icon to look for on your browser. Click on it and allow access. After allowing access to the pop-up, it should either automatically redirect you, or you will need to push the Matter Folder button again to reach the sign-in screen.

- When you the pop-up appears, you will see a request from Microsoft to allow SILQ permission to access SharePoint. Upon accepting this permission and successfully gaining access to SharePoint we can close that screen and return to SILQ.
-
Pushing the Matter Folder button again should take you directly to the SharePoint folders, confirming that it has signed in successfully and you are ready to go.
Connecting your Microsoft 365 Emails
The above steps connect you to both SharePoint and Microsoft 365 emails. The way you can confirm that your emails are connected is to:
- Navigate to --> Go To --> Inbox
- On the left hand side it will show you which email account is connected. If it is blank it means it has not worked, so you will need to follow the above steps.
- If there is an email account there but it is not the want you want to associate you will need to follow point 3 of the SharePoint instructions.