Set Up SMTP / IMAP Emails
By setting up your emails via SMTP/IMAP you can send emails directly from SILQ. However, you cannot receive emails.
In order to connect your email to SILQ via SMTP/IMAP, please follow the below steps:

1. Click on your name in the top right corner of the SILQ window and a drop down menu will appear. Click on System Settings.
2. On the left hand side navigate to Email Configuration.
3. On the right hand side you will see a new window with a dropdown titled Email System.
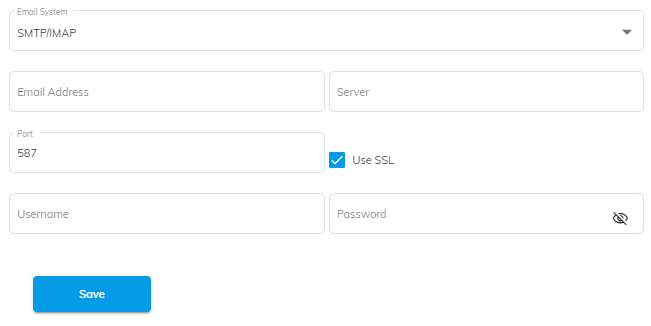
4. Choose SMTP/IMAP as the system. The below fields should be available.

5. The fields are explained below:
Email Address - Type in the email address you want to use in SILQ
Server - Please confirm with your email host provider what your server is, however it is normally something like mail.yourdomain.com.au
Port - it is normally 587, however please confirm this with your email host provider
SSL - this is normally ticked on for security reasons, however your email host may request that you untick it
Username - normally is simply your email address
Password - this is the normal password you use to sign in to your emails
6. Once done, click on save.
7. Navigate to the Generate Documents button in the matters window and generate an email template.
8. Check that you can send an email. If you are unable to, this means there is something not quite right in step 5. Please navigate back to Email Configuration and make the necessary amendments.
