
- Help Centre
- Setting up SILQ
- Configuration and Customisation
-
Setting up SILQ
-
Getting Started with SILQ
-
Financial Management
-
Advanced Accounting and Reporting
-
Trust Accounting
- Trust Accounting
- Controlled Money Receipts
- Statutory Deposits and Receipts
- Entering and Transferring Unknown Deposits
- Trust Accounting Chart of Accounts
- Trust Reporting
- Deposit Adjustments and Withdrawals
- Trust Account Bank Reconciliations
- Trust Reconciliation Example Scenarios
- Trust Transaction Dating and Trust Money Recording
- Trust problem trouble shooting
- Protected Trust
- Automatic Bank Feeds
-
Legal Details
-
Document register, Document templates and Court Forms
-
Using InfoTrack in SILQ
-
Using SILQ Outlook Add-In
-
SILQ & Word Integration
-
Exporting Data
-
Invoicing
-
Using SILQ
-
Reports
-
Emails in SILQ
-
Estates
-
Time Entries
-
MYOB
-
Xero
-
Dashboards
-
Budgets
-
Permissions
-
Contacts
-
SILQ Security
-
Early Access
-
Moving to SILQ
-
What's New
-
SILQ Desktop
-
Subscription & Billing
-
Lexon Integration
-
Firm Directory
-
Pricing Plans
-
Sales & Marketing Features
-
PEXA
Lookups
There is another feature to make data entry easier which is called Lookups. Throughout SILQ, there are various drop down list boxes which can be predefined with text. Lookups are the lists that show in the drop down lists such as on the case details tab in the update matter window, or the document type for Safe Custody.
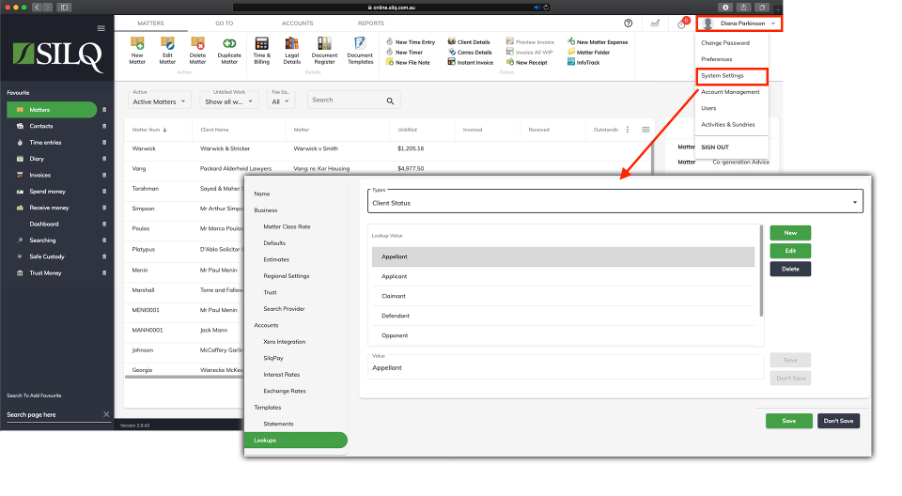
For example, if there is a particular matter description you always deal with, instead of having to type the Matter description in every time you create a new matter, you can predefine the text that will appear in that drop down list, and just click it. Lookups can be edited and added by clicking on your name in the top right corner to view the drop down menu, then clicking System Settings.
Once you are in Settings, click Lookups in the left side bar. You will see a Types dropdown menu list of all the menu types with the lookups that are already entered into SILQ. If you want to edit any one of the entries, click the text by clicking on it once and then click the Edit button.

To add your own Lookup for example to the Matter Type drop down list in the Update matter window, click the New button and then enter your text in the value field below the Lookup box and then click Save.
Once you have finished, to save your settings, click Save on the bottom right-hand side of the settings window.
When entering invoice text through the Invoice text window there is a list of pre- defined text that can easily be selected from a drop down list box. SILQ will dynamically match the list to the currently selected item so that you can start to type what you want and it will predict the text that you want in a dropdown box. If it has predicted the correct text, then you can simply click the text in the dropdown list to complete the text.
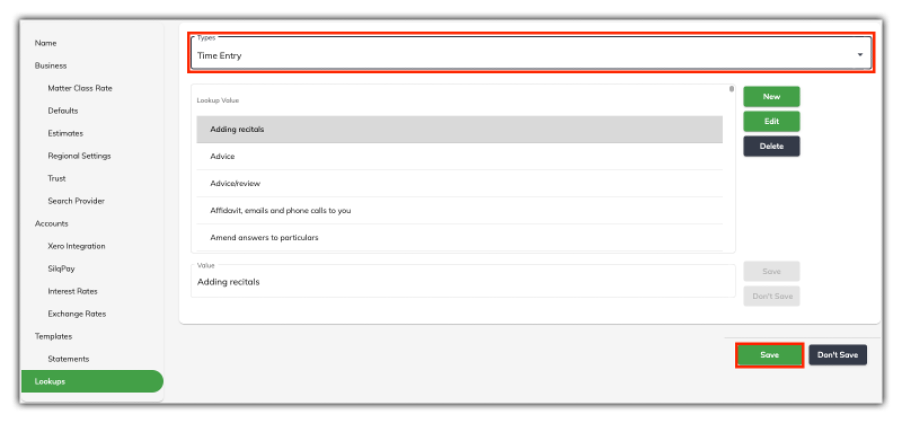
You can add to this predefined text list through Lookups in Settings. From the Types drop down menu select Time Entry, click the New button and then enter your text in the value field below the Lookup box and then click Save.
Once you have finished, to save your settings, click Save on the bottom right-hand side of the settings window.