
To get to your System Settings, click on the cog icon in the top right corner of the SILQ window that will take you directly to the System Settings window.

SILQ is very customisable and this is the section in which you are able to choose most of those customisations.
In each of the below sections, if you do not update any settings they will remain as the default that is already displayed on screen. If you do change any of the options, then be sure to press save on the bottom of the screen (you will need to do this for each section on the left hand side you are in).
Organisational Details
.png?width=670&height=369&name=Getting%20Started%20with%20SILQ%20(2).png)
Fill in your company name.
Enter all your current address details. If your postal address is the same as your street address details, you can save time by clicking on the copy from street address button.
Enter your current Phone, email and website details (if applicable).
This information will be used on your invoices, receipts, documents and reports.
Click Save
Business Setup
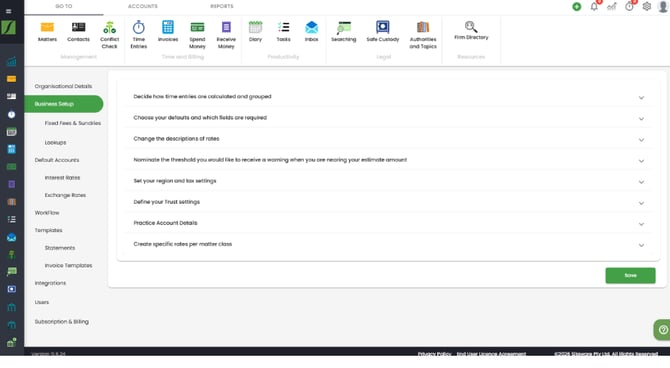
This section provides you with options to:
1. Decide how time entries are calculated and grouped. There are 6 options here for you to update.
2. Choose your defaults and which fields are required.
This section will save time when creating each matter as it will automatically select these fields when filling in matters and invoices.
This includes options such as your matter number strategy - e.g. when you create a new matter SILQ will automatically number it for you based on your preference. There are more than 40 options to choose from e.g. Year + Number (i.e. 2024-0001).
Go through each field in this section and choose from the dropdown for each preference.
3. Change the descriptions of rates. SILQ gives you the option to use 6 rates. By default the rates are titled Rate 1, Rate 2 etc. In this section you can name each rate so you easily know when recording a time entry which is the relevant rate. E.g. you may have a different rate for different types of work such as giving advice would be different from working on a legal aid project. Name them to suit your practice.
4. Estimates - Here you can nominate the threshold you would like to receive a warning when you are nearing your estimate amount. Eg. if you set the percentage to 20% then the warning will occur when you are within 20% of the estimate.
5. Set your region and tax settings - i.e. your country, currency etc.
6. Define your Trust settings - Here you can choose your state to control the slight variations in Trust rules, enter your trust account details and if you are migrating from another trust system, you can set your initial trust values so that your receipt codes etc follow on from your old system.
7. Here you can enter your practice account numbers. These will be used when you do a trust to office transaction.
8. Create specific rates per matter class - fir example if your practice does both conveyancing and family law and you charge a different rate based on the type of matter it is, then in this section you can set a different rate for each matter class. For this to work, you need to ensure that when you are creating a matter you change the matter class in the edit matter window to be either family law or property sale etc.
Click Save
Search Provider

Enter your search provider, then your Username and Password to start using your search provider.
Click Save
Accounts
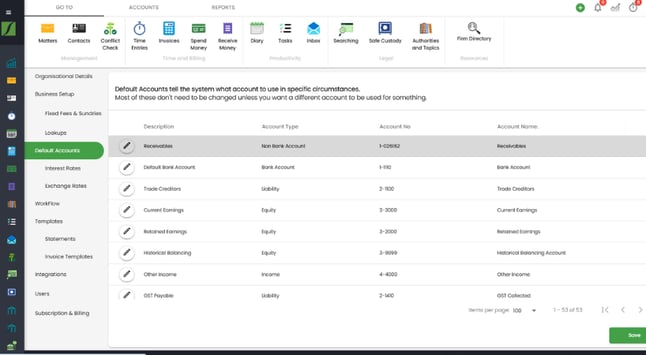
Setup and edit all of your bank accounts. You can add bank accounts by clicking on the “Acc No” Icon, then clicking on “New Account”
Click Save
Xero Integration
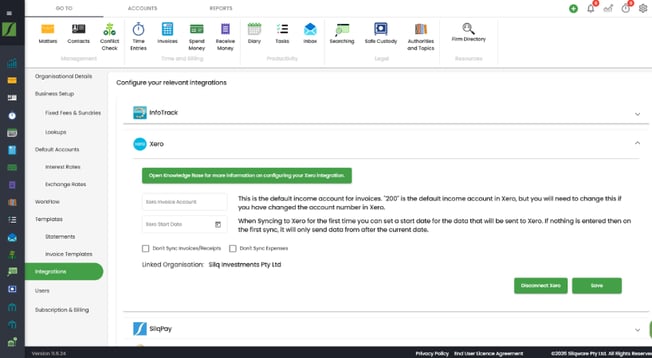
Add your Xero Invoice Account as well as choosing sync options. Once finished, click on Test Connection.
Click Save
SilqPay
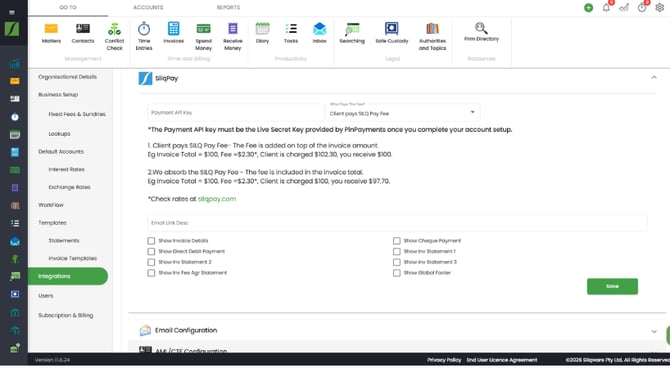
Here is where you can set up your SilqPay. Enter your Payment API Key and select who pays the fee. “Email Link Desc” is where you can customize what you want the email link you are sending out to say, for example “Please click here to view and pay your invoice”. If you want any of the below option to show on the invoice, simply tick the check boxes. For example if you want the client to have the option to pay with direct debit, click on the “Show Direct Debit Payment” check box.
Click Save
Interest Rates
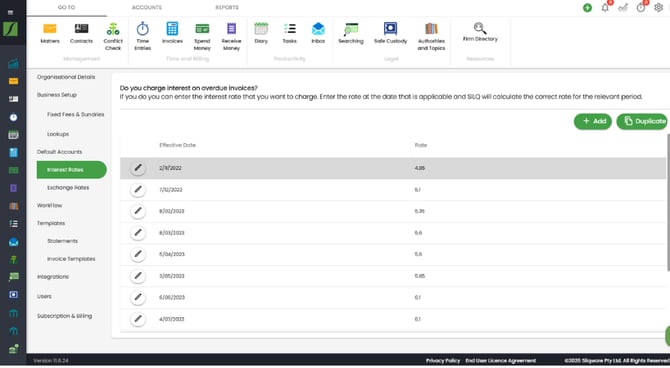
Here is where you can add an interest rate amount, effective date and the calculation method for clients who have overdue invoices.
Click Save
Exchange Rates
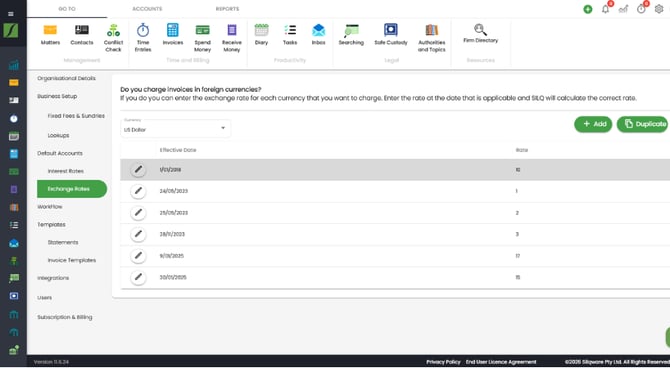
SILQ allows you to set exchange rates for various currencies by selecting the currency and exchange rate if you wish to invoice clients using a different currency.
Click Save
Templates
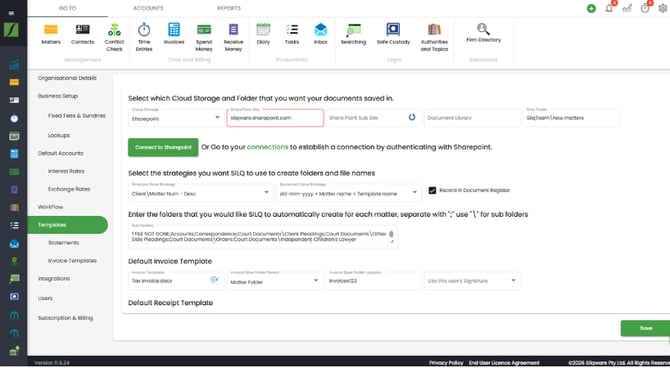
Here you can edit where each of your templates will be saved, as well as their save strategy.
You can edit the templates individually as to where you would like each matter to be saved by clicking on the invoice template icon. Document system refers to your online storage database; such as OneDrive. Enter in your document system, then the root folder for where you want the template to be saved.
Click Save
Statements
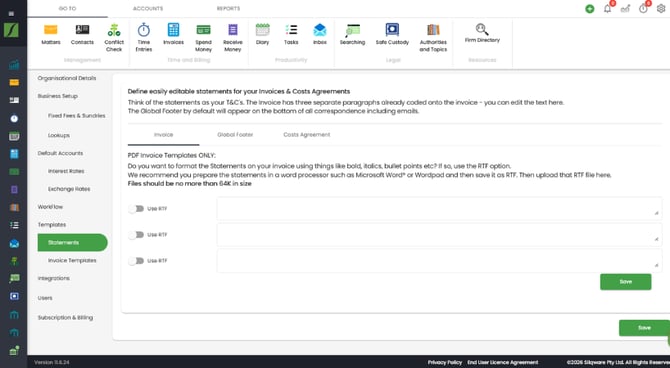
Here you can customise text to appear on each of your regular documents such as invoices, global footer (every document you produce) and your costs agreements.
Click Save
Lookups
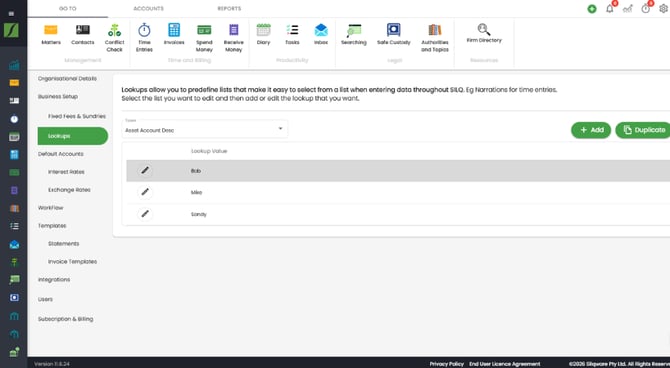
There is another feature to make data entry easier which are called Lookups. Throughout SILQ there are various drop down list boxes which can be predefined with text. Lookups are the lists that show in the drop down lists such as on the case details tab in the update matter window, or the document type for Safe Custody.
For example, if there is a particular matter description you always deal with, instead of having to type the matter description in every time you create a new matter, you can predefine the text that will appear in that drop down list, and click it to use it.
Click Save