
When navigating through SILQ, you may want to tailor your view so you're only seeing the entries (e.g. matters, dates, time entries etc) most relevant to you.
You can do this from almost every window within SILQ.
The best list views come from using a combination of all three below.
Field Configuration
Clicking on the three dots above the main window will give you a few options including the Field Configuration button. In any window this button will open up the Configure Fields window, which will allow you to customise the fields that appear in the active window you are viewing.
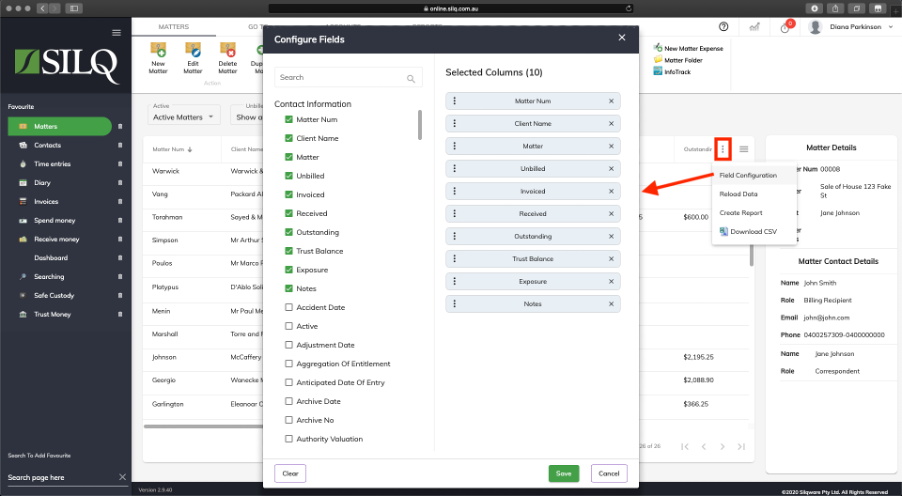
In the example above we are on the matters window, and the fields that are visible run across the top of the main window. If you want to display more fields, simply click the check box and they will be added across the top of the main window. You can also rearrange the fields by clicking and dragging the selected columns on the right. To remove them, simply click the “x’ on the right of each blue bar. The below screen shot shows the fields across the top of the main window.

Filters
Each window also has a section of filters further helping you to customise each window.
Following on from the above example in the Matters window, use a range of filters, helping you quickly locate and organise the matters most relevant to your workflow. You can filter by date range, matter class, status (e.g. active or archived), billing status (invoiced or unbilled work), and assigned fee earner, among others.
For example, if you are a Fee Earner, use the fee earner filter to only show you matters where you are the assigned fee earner.
Or perhaps you only want to view matters that are still active, you can use the active filter to filter out inactive or prospective matters.
Sorting
In SILQ, you can easily sort columns within any window to organise your list views in a way that suits your workflow. Simply click on a column header — such as Matter Number in the Matters window — to sort the list in ascending or descending order. This allows you to quickly prioritise what you’re looking for, whether it’s viewing the invoice date, settlement date, unbilled WIP amount, client name or available trust balance. Combined with filters & field configuration, column sorting gives you powerful control over how your data is displayed, helping you work faster and more efficiently.