Exporting Data from SILQ
Most windows within SILQ allow you to export all of your data to a CSV file.
To export data in SILQ, first, you will need to decide which windows you will be exporting from. The current windows you are able to export from are:
- Matters
- Contacts
- Time Entries
- Invoices
- Spend Money
- Receive Money
- Safe Custody
- Trust Money
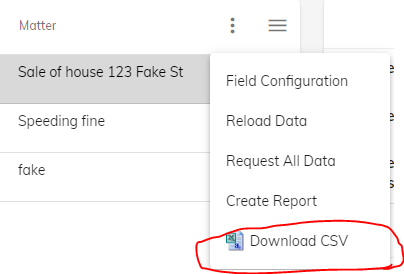
Once you have decided on the window you want to export, navigate to the 3 dots on the right-hand side and click on Download CSV


Please note Downloading CSV will only download information for the fields that you have configured. For example, in the screenshot below, the selected columns on the right the fields that will be exported.

However, if Accident Date was a piece of information needed, then it will need to be ticked on the left hand side, adding it in to selected columns.
The same can be done for the reverse. E.g. if you are exporting information not necessary such as the field exposure, then you would remove it from selected columns list.
Please note you can change the order of the columns by dragging the selected column up or down to put it in the order you would like.
