

You can access the Timer via the Time Entries window. To do this click on the New Timer button in the Top Toolbar, highlight a matter and click Select .
Click on the Start button to start the timer. The Timer will close down and a timer will appear on the right-hand side of the screen.
When you have completed your work, click on the Stop button under the timer on the right-hand side of the screen.
The timer window will open up again and will have automatically put in your cost for the work you have done. Next enter the Invoice Text and then click on Save to record the time entry.

You can click on the Stop button to pause the work you are doing, and then click on the Start button to resume the work you are doing.
You can also change the time or amount before saving.

After you have saved the time entry, you can resume the timer even after the time entry has been recorded. To do this click on the time entry to select it and then click on the Edit Entry button on the right hand menu, where a drop down menu will appear allowing you to select the option Resume Timer. The timer window will open up where you can click on the Start button and it will resume the timer for the time entry, even if the time entry wasn’t originally entered via the Timer.
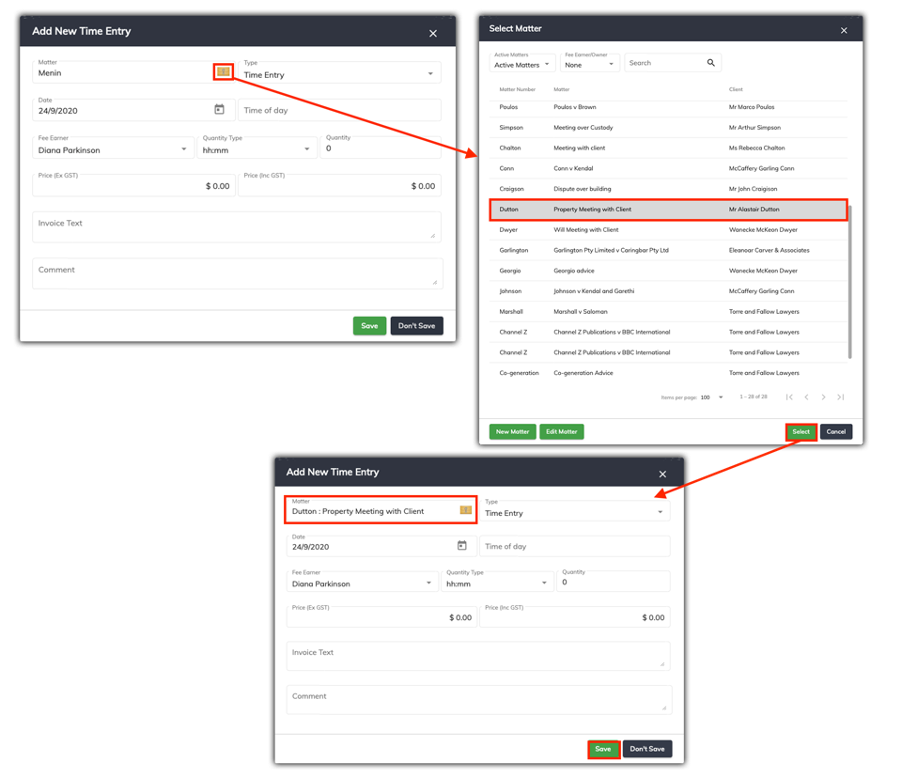
If you have selected the Timer and realised you wanted to add time against a different matter to the one the timer is selected for, you can click on the Folder icon next to the Matter number and name. The Select Matter window will open up where you can click to choose an alternate matter and then click on the Select button. You can then proceed to start the timer and this time entry once saved will be recorded against the selected matter.