Entering a new Controlled Money Bank Account into SILQ

When you enter a Controlled Money Receipt, you will need to select a Controlled Money Account to allocate the receipt to. In order to do this, you will first need to set up a new Controlled Money Bank Account.
To enter new Bank Accounts details into SILQ there are two methods. It can be done ‘on the fly’ whilst you are Adding a Controlled Money Receipt or via the Chart of Accounts.
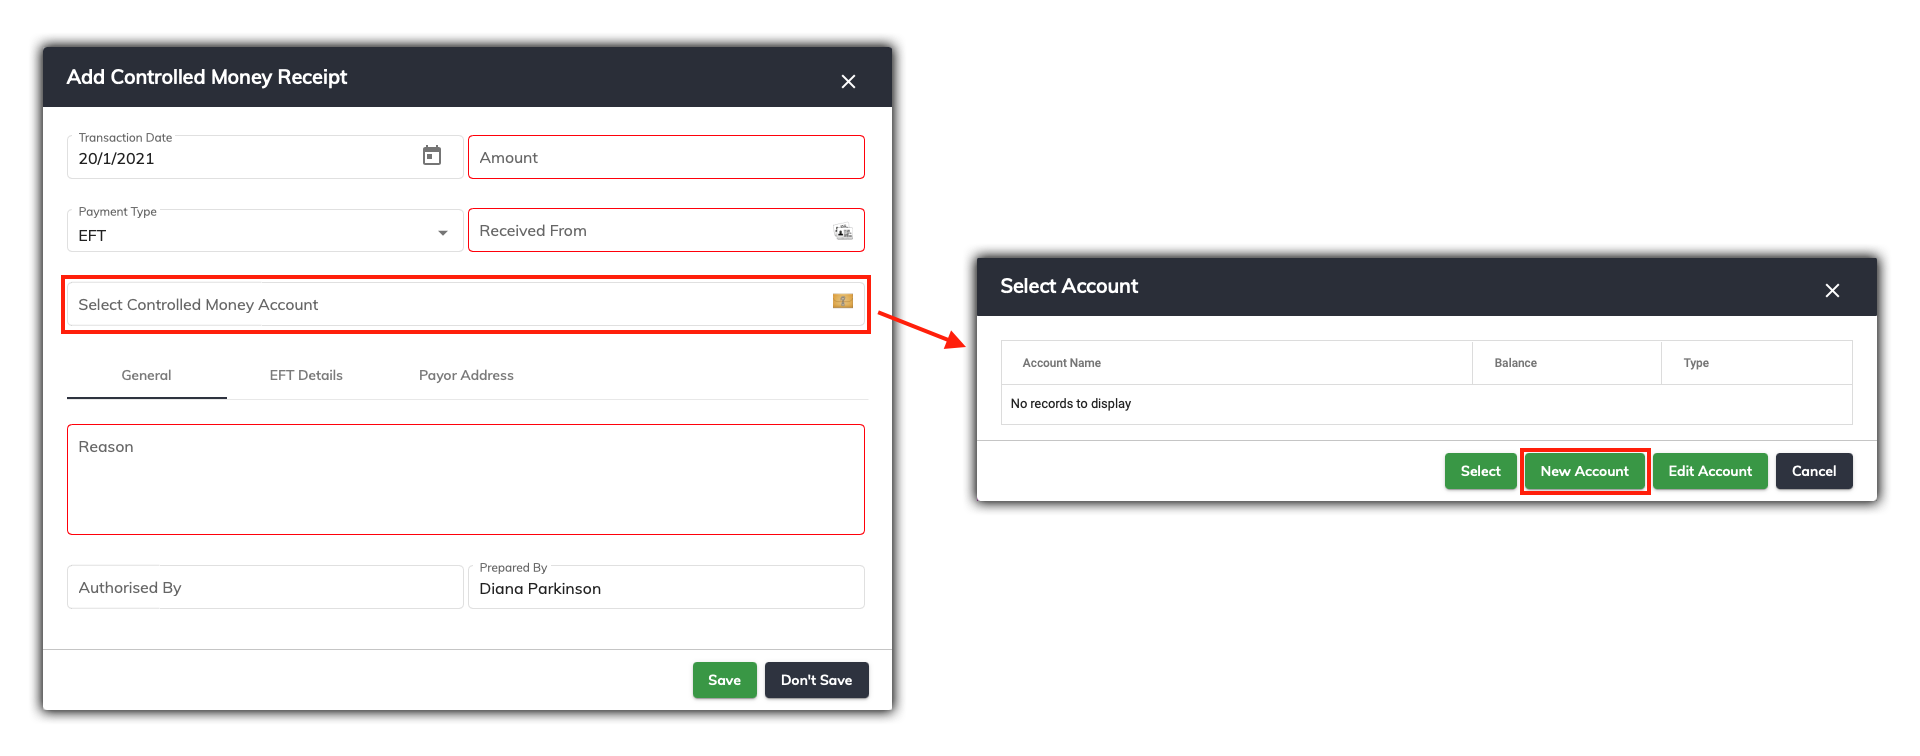
To add a bank account via the ‘on the fly’ method, click on the Select Controlled Money Account button within the Add Controlled Money Receipt Window.
The Select Account window will open up, and you will be presented with a list of available Controlled Money Accounts. In the example above, there are no accounts available, so a New Account must be added.
To set up a new account, click on the New Account button in the Select Account window, you will then need to link the Account you are about to set up to the correct Matter. In the select matter window that opens up, in the example below, we are linking the account to the Georgio Matter.
Click on the Select button.
A new account can also be added in the Chart of Accounts accessed via the Trust menu at the top of the screen. Refer to this article.

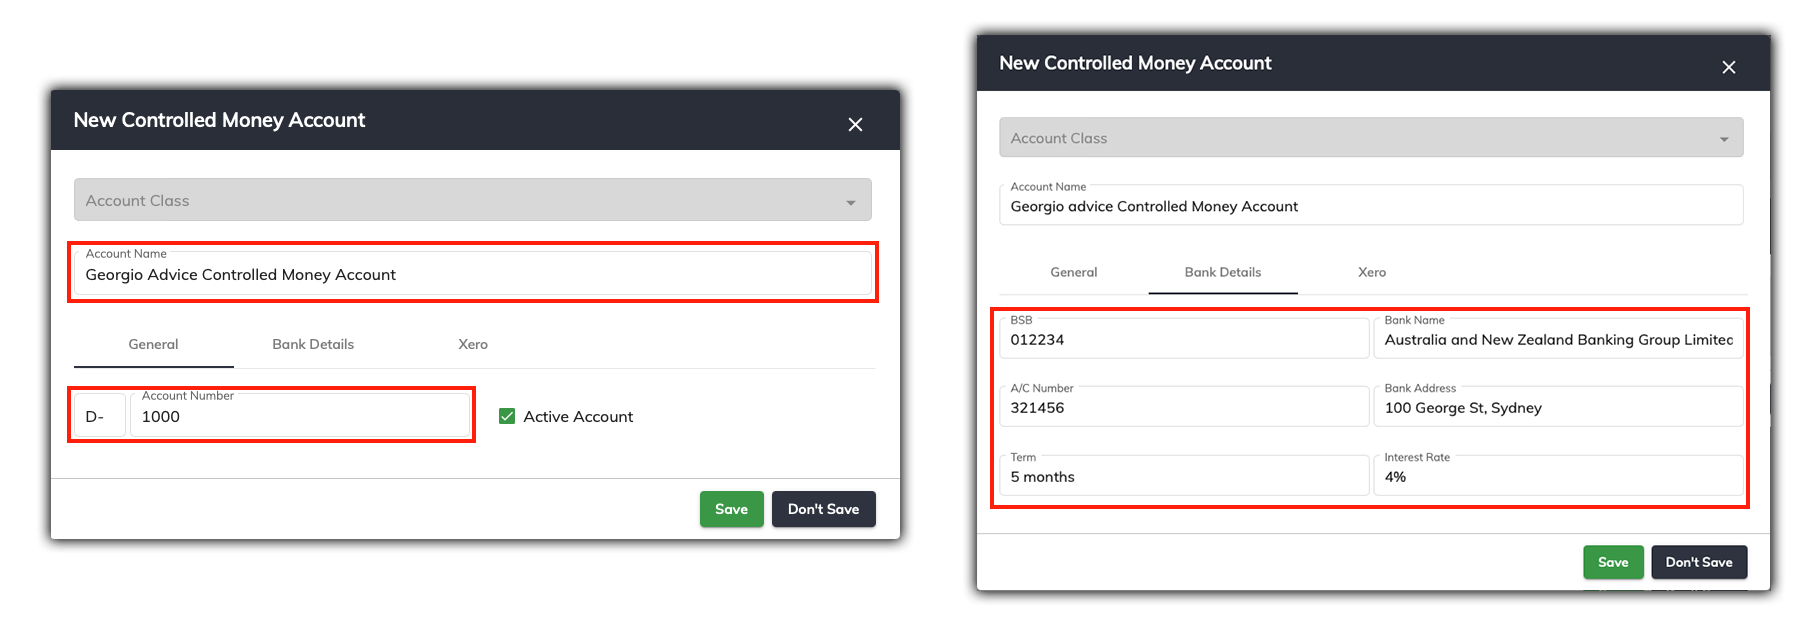
After clicking Select, you will be taken to the Update Account window, where you will need to enter the account name, number and bank account details for the account you are setting up.
First of all though, you must give it an Account number. This is the 4 digit account number that identifies the account. The full Account Number must be unique and will begin with the appropriate Header account number (in this case D - ).
Click on the Bank Details Tab which is where you enter the bank account details. The following fields need to be filled in:
-
BSB: Bank BSB details
-
Bank Name: Enter the name of the financial institution
-
A/c Number: Bank Account number
-
Bank Address: Street address of the financial institution
-
Term: How long the monies have been deposited for
-
Interest Rate: Interest Rate being achieved
If you do not have Bank Account details to enter (which is entirely possible at this stage), you can skip the details, but you WILL be re-prompted to enter the details at a later date. An End of Month cannot be performed without the proper details.
