
When you need to create a receipt for income not relating to a matter, you can create a new general receipt from the Receive Money window.
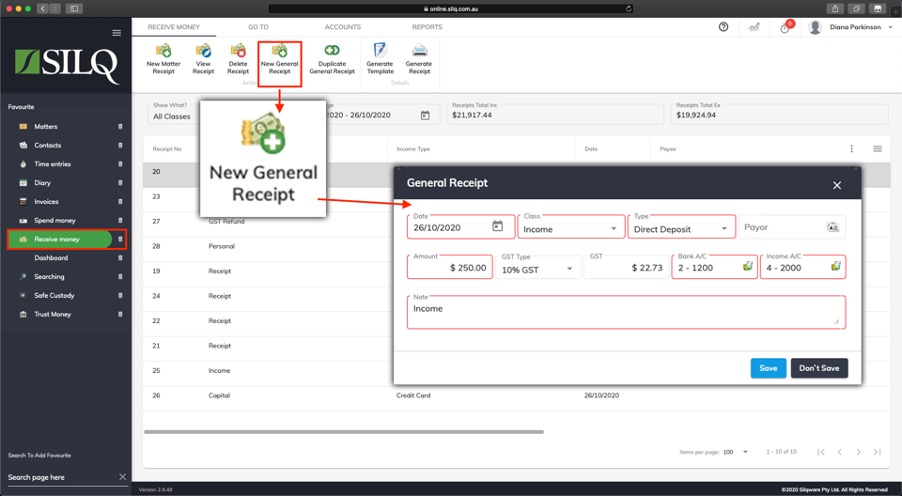
To enter a new general receipt, click on the Receive Money button in the left Favourites Bar. Once you are in the Receive Money Window, click on the New General Receipt button in the Top Toolbar.
SILQ will then open the Update Receive Money window, which will allow you to enter the details of the General Receipt. A description of each field is listed below:
- Date: The date the item was received.
- Class: Select a class for the Receive Money item. This tells SILQ how it should be dealt with.
- Income: The most common and is a regular income item such as dividends, this will go onto the GST statement
- Capital: This is for capital income. It will still go on the GST statement, and you will need to select the Asset account that the capital is for.
- GST Refund/Tax Refund: If you get a Tax or GST refund from the ATO then use this option. SILQ will then know it is not a claimable income item.
- Type: Select what payment method you used.
- Payor: Enter the name of the person or company who paid you. Start typing the name and SILQ will match the name to existing contacts. If it doesn’t exist just enter the name and when you save the record you will have the option to save the payor as a contact so it is available next time.
- Amount: Enter the full amount that was spent.
- GST Type: Select how GST applies to this income.
- 10% GST: The full 10% GST is to be applied - SILQ will then calculate the GST and the Ex-GST amounts for you.
- No GST: This item does not contain any GST.
- < 10% GST: This item has a partial amount of GST. You will then need to enter the amount of GST for the item.
- GST: This is the amount of GST contained in the item. If you have selected either 10% GST or No GST SILQ will calculate this for you but if you have selected < 10% GST you will need to enter the amount yourself.
- Bank a/c / Asset a/c: This is the bank account that money was deposited into. This may also be Petty Cash, a Credit Card. SILQ will show you the accounts that are appropriate to select from.
- Income a/c / Asset a/c / GST a/c / Equity a/c: Depending on the Class that has been selected the second account that needs to be selected will differ. As such the name will change accordingly and SILQ will show you a different list of accounts. Generally it will be an Income account that categorises the income.
- Notes: Enter a description of the income.
Once you have completed all the relevant fields click on the Save button, and you general expense record will be created.