Correcting/Editing an Invoice that has been created

Once an Invoice is created, the time entries will be removed from the Work In Progress tab and an invoice will be created which you can view in the Invoices tab within the Time and Billing Window. To view the invoice, click on the View Invoice button on the Top Toolbar, the View Invoice window will open up and you will be able to see all the time entries that were added to this invoice.
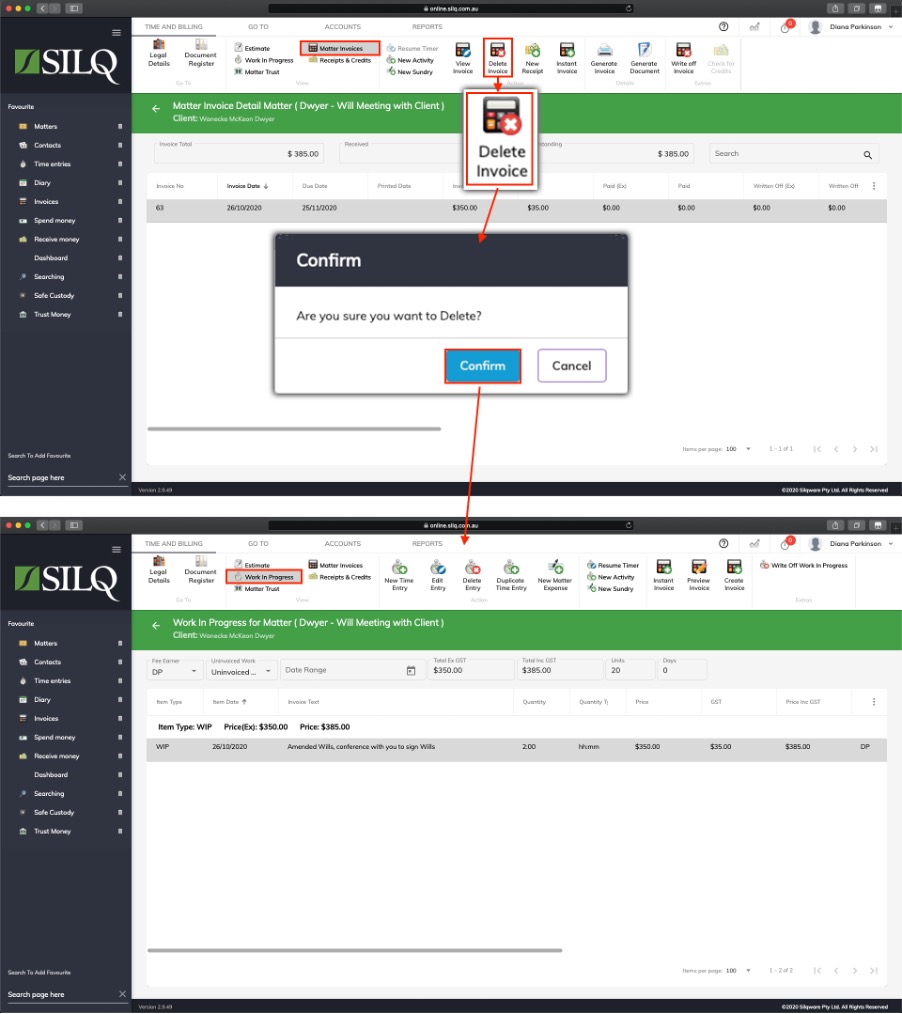
If you need to edit the invoice to let’s say add an additional item to the invoice, the only way to modify it is to delete the invoice. This will put all the time entries back into the Work in Progress tab, where you will be able to make the necessary changes, then re-create the invoice.
To do this, go to the Invoices tab, click on the invoice you want to modify, and then click on the Delete Invoice button in the Top Toolbar. A message in a dialogue box will appear confirming that you want to remove this invoice. Click Yes if you are sure.
Next, click on the Work in Progress tab and all the time entries that were on the invoice will be put back into this section. You can now re-tag all the time entries as well as add in the extra items you wanted to put on this invoice and re-create it.
