Completing Deposit Adjustments

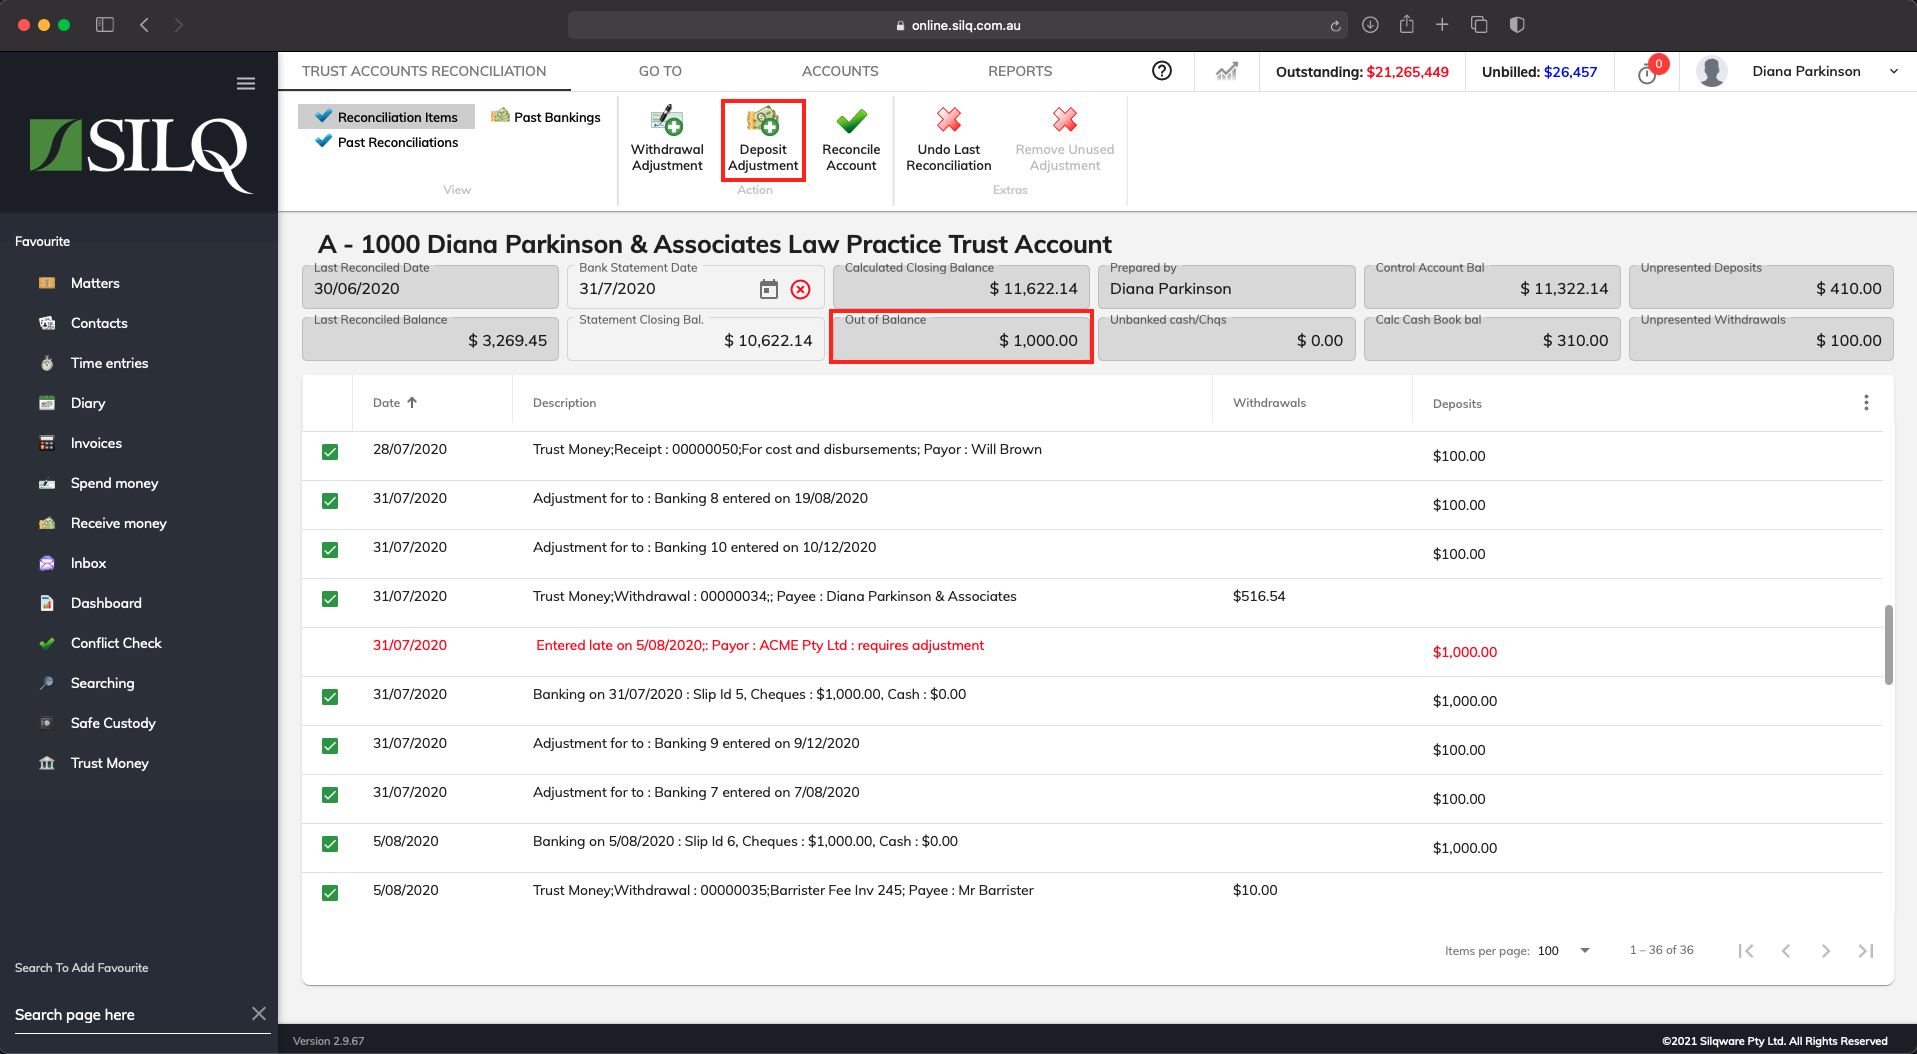
Referring to the example above, after tagging all the transactions, SILQ is showing that this trust account is Out of Balance by $1,000. This is because the $1,000 entry was only entered into SILQ in August, when it really went in on the 31st of July. Therefore a deposit adjustment needs to be entered.
To do this, click on the Deposit Adjustment button in the Top Toolbar.

After clicking the Deposit Adjustment button, the Add Deposit Adjustment window will open up and list all the transactions that you want to make an adjustment for.
When you click on the adjustment that is listed, the Adjustment Date and Amount field will automatically be filled in for you.
You just need to enter a description into the Description Field with as much information as possible about the reason why the deposit adjustment is needed
Then click on Save.

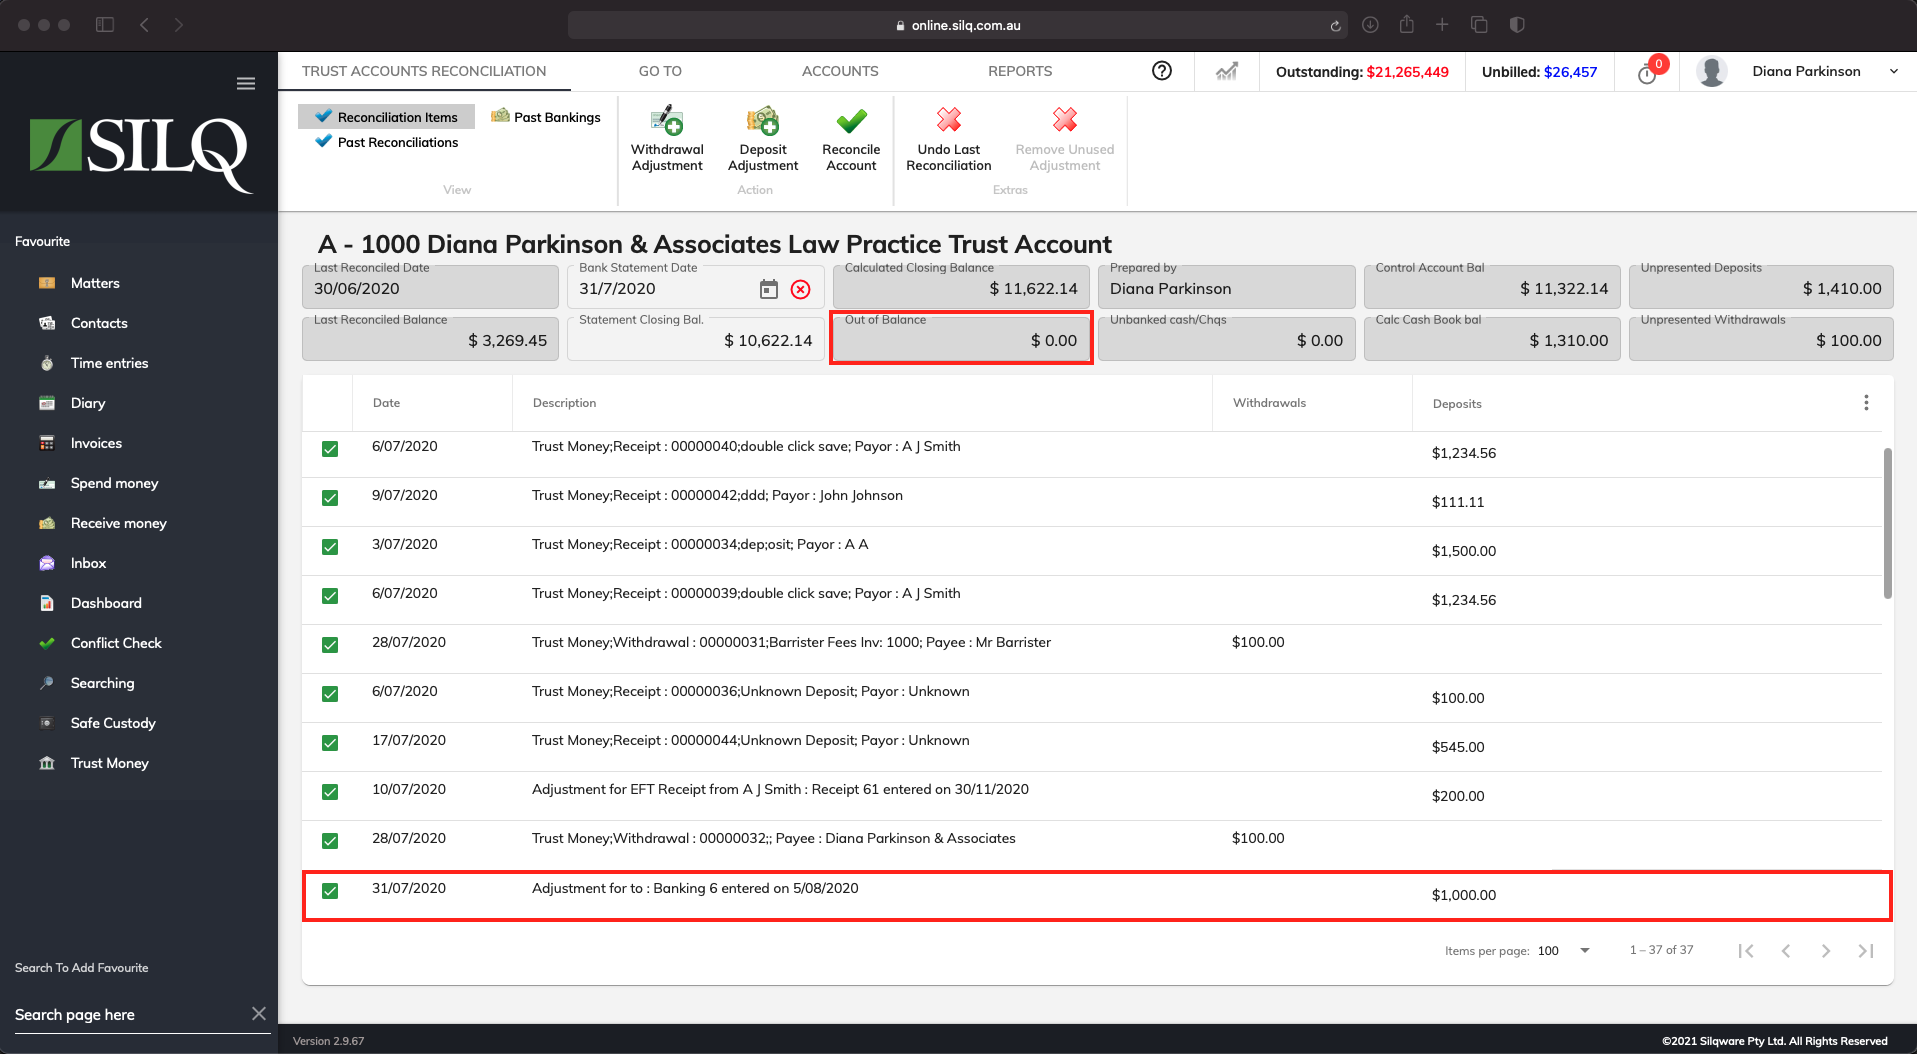
The adjustment will now appear in the reconciliation window. By ticking it, the trust account will now balance, and you can proceed to reconcile the account by clicking on the Reconcile Account button in the Top Toolbar.
