
The Chart of Accounts is the list of ledger accounts used to track the financial information in your practice and produce financial reports. The Chart of Accounts is a way of coordinating all your expenses and income and getting a holistic view. The accounts are arranged into 5 groups: Assets, Liabilities, Equity, Income and Expenses.
Accounting requirements special note: The accounts described in this section are designed to assist you in managing your practice. SILQ does not warrant that information generated by the accounts will satisfy accounting, tax or reporting obligations. You must seek the independent advice of an accountant or other relevant advisor to ensure that you comply with any accounting, tax or reporting obligations.
To get to the Chart of Accounts, do the following:
Click on Accounts in the Top Toolbar and then click on Chart of Accounts. This will take you into the Chart of Accounts screen.

Below is an example of the main Chart of Accounts screen.
The accounts are allocated to different numbering systems. These are the ‘Header’ accounts. Header accounts are not editable.
All Detail Accounts sit under the header accounts and each detail account under a particular header will have the same numbering system. Those numbers after the dash are editable.
You can edit existing detail accounts or add as many new detail accounts as you like.
Header Accounts:
- 1-0000 = Assets
- 2-0000 = Liabilities
- 3-0000 = Equity
- 4-0000 = Income
- 5-0000 = Expenses
Detail Account examples:
- 1-1000 = Current Assets
- 1-2000 = Non-Current Assets
Please note: Bank Accounts are a special type of Detail account as they can be used in specific cases and can also be reconciled.

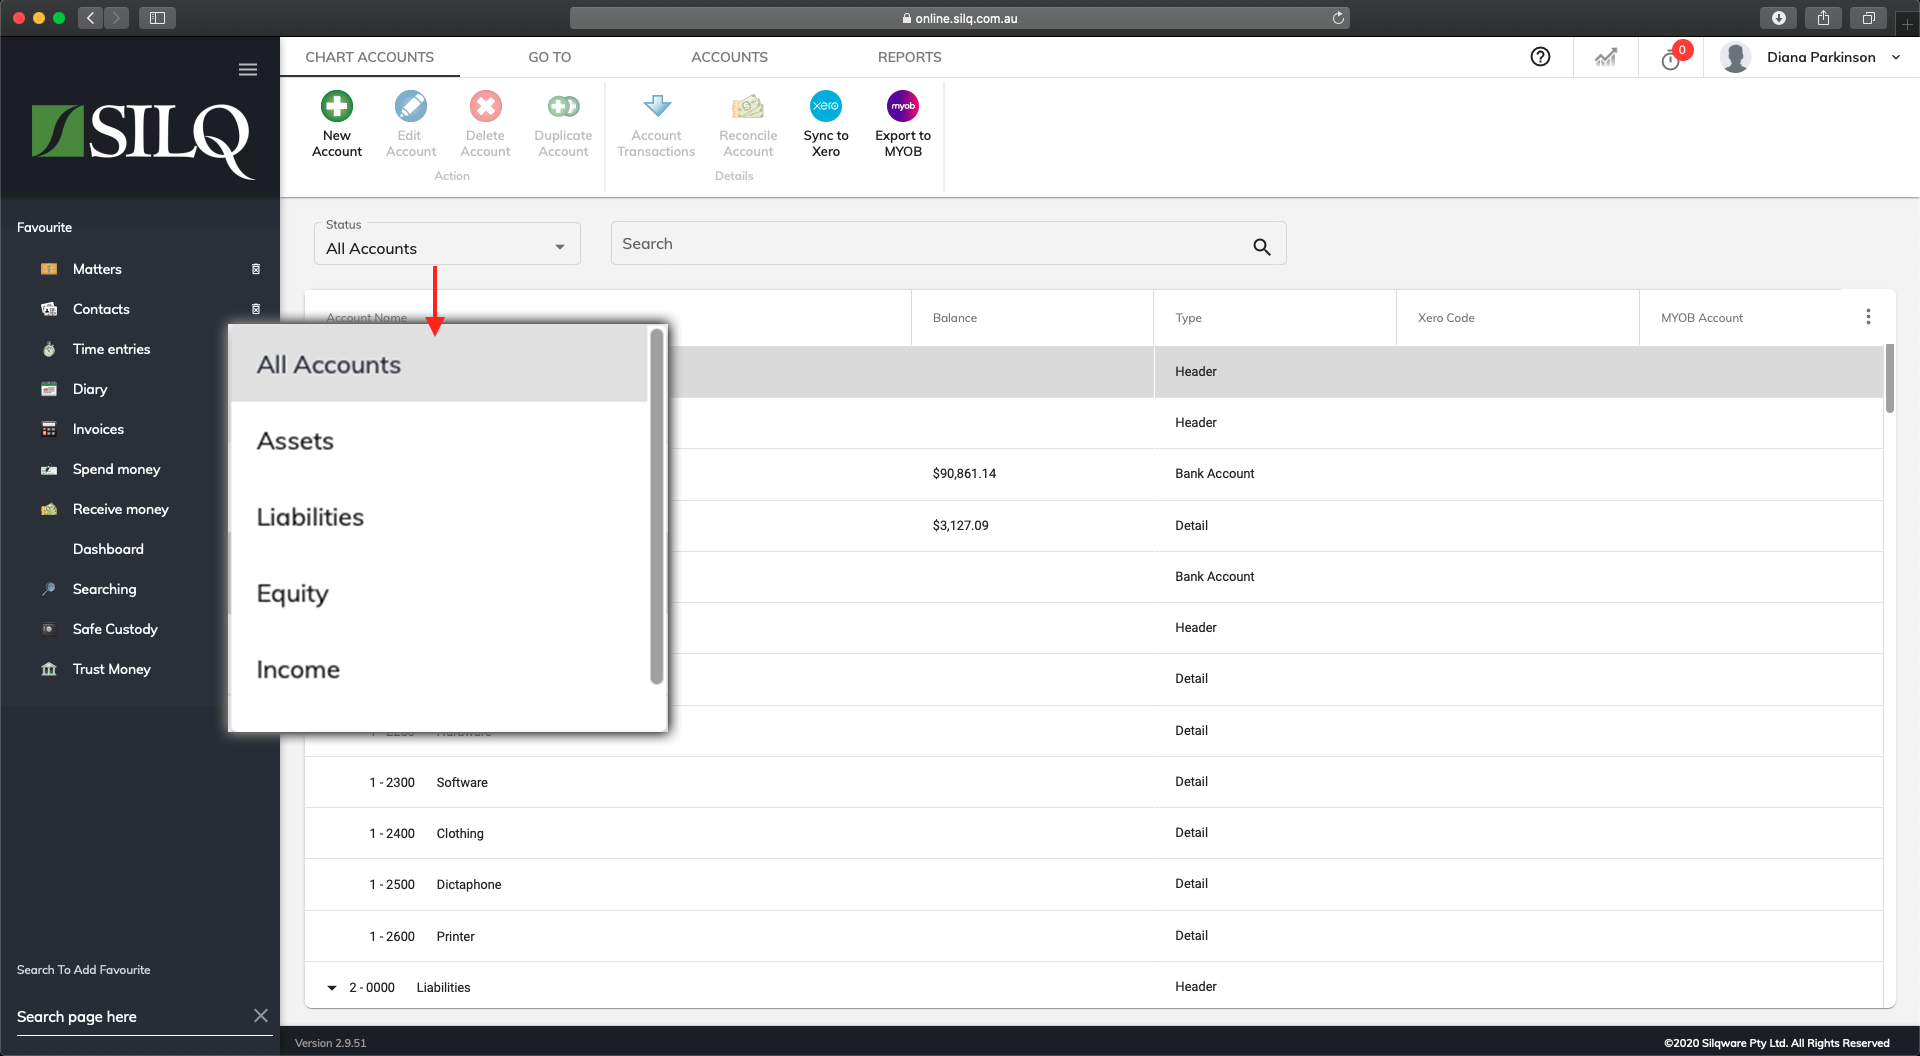
The Status drop down menu allows you to filter which type of account you want visible in the accounts list. By default it shows all accounts.
Ribbon Buttons
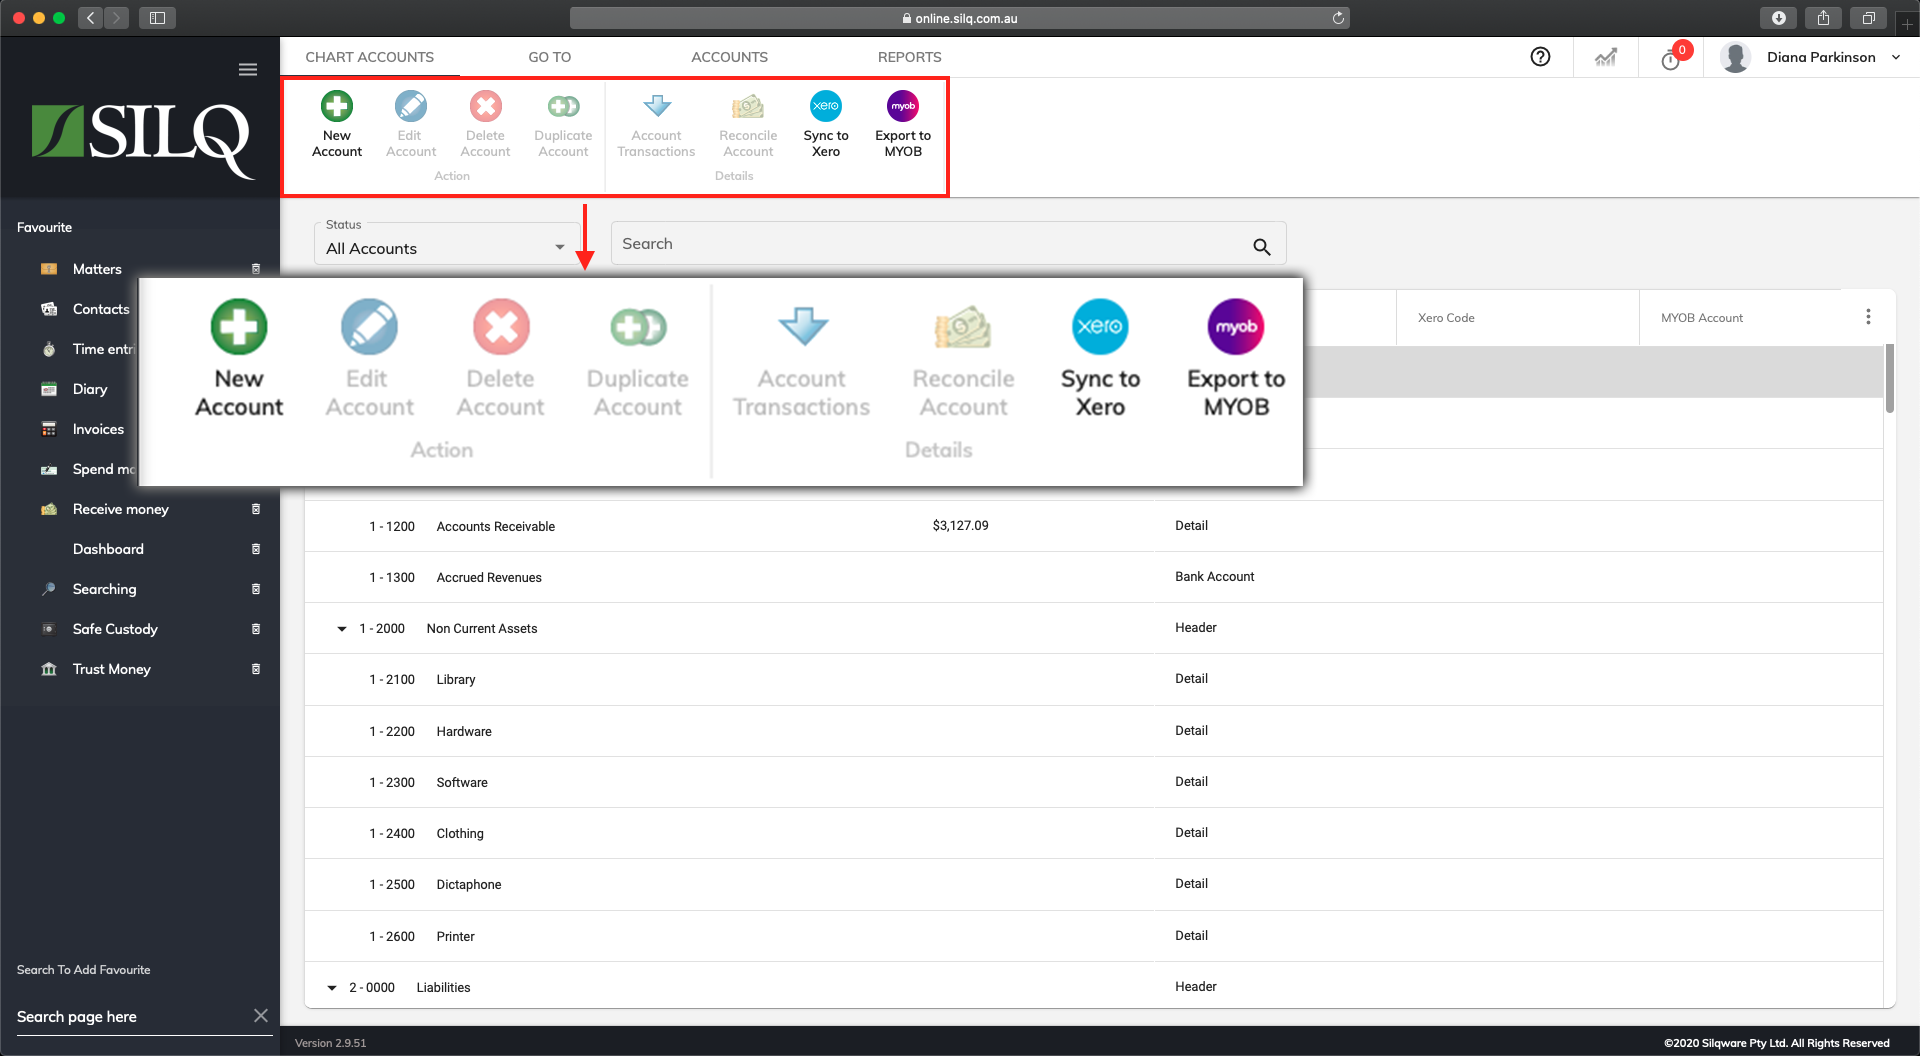
The buttons located on the Ribbon (top toolbar) give you all the functionality you will need to create, edit and view transactions on a particular account.
Below is a description of the functionality of each button:
- New Account: This will create a new account.
- Edit Account: This will edit the selected account.
- Delete Account: This will delete the account from the Chart of Accounts. You will not be able to delete the account if any transactions have been posted against it or it has child accounts.
- Duplicate Account: This will allow you to duplicate the selected account.
- Account Transactions: This will open a window that will show you all the transactions that have been posted against the account.
- Reconcile Account: For Bank accounts only, you will be able to reconcile the accounts.
- Sync to Xero: To send transaction in accounts linked with Xero to Xero.
- Export to MYOB: This will export your data into the MYOB 2020.2 format.
Adding or Editing a Detail Account
For example, you may wish to enter your own Bank Account (Asset) details or Expense Categories or Credit Card (Liabilities).
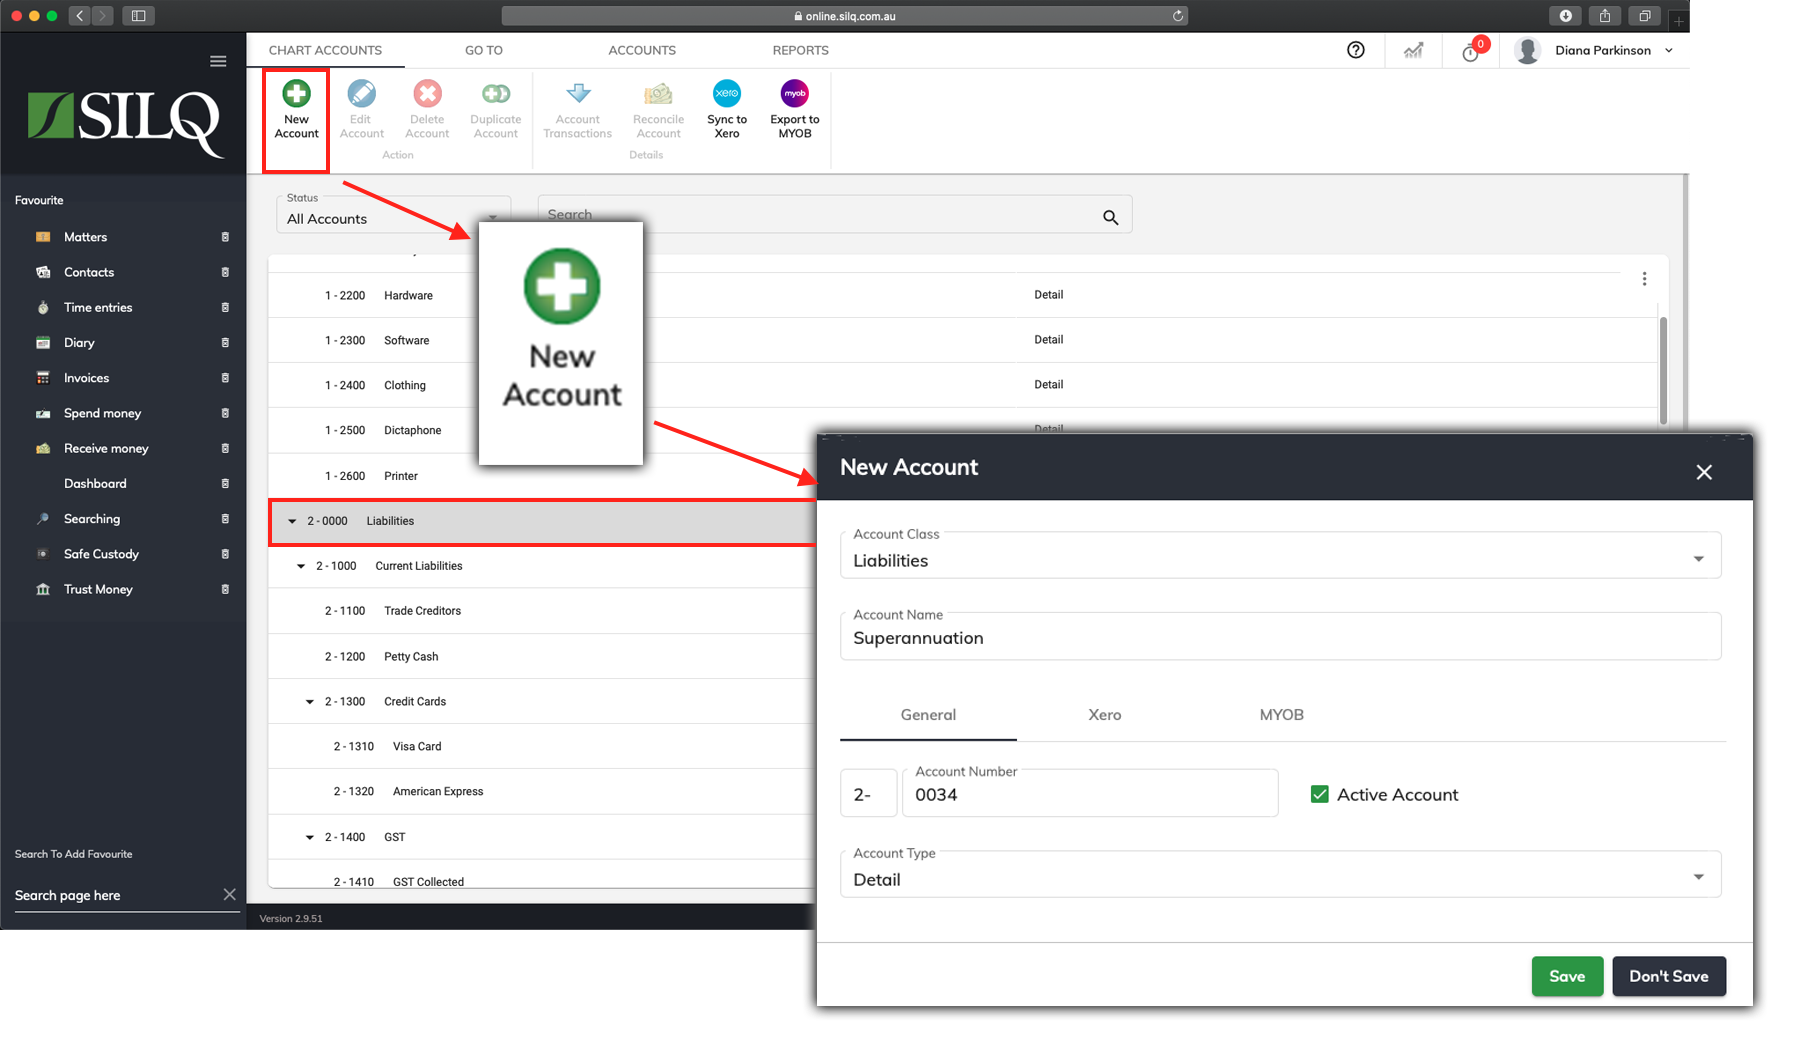
To add a new detail account, first, click once on the Header Account in the main window that you want to create a detail account under. Next, click on the New Account button in the Top Toolbar.
The New Account window will open up which will allow you to enter the information for the new account.
Below is a description of the fields you will need to enter for a detail account.
- Account Class: This is the account class that the Account will belong to: Asset, Liability, Equity, Income, or Expense
- Account Name: This is the unique name of the account e.g. Superannuation
- Account Number: This is the 4-digit account number that identifies the account. The full Account Number must be unique and must begin with the Header account number you wish it to fall under (as in 1. Assets 2. Liabilities etc)
- Active Account: This indicates if this account should be made available for use within SILQ
- Account Type: This indicates what type of account it is. There are 3 types: header, detail and bank account. A header account cannot be posted to: it is purely for grouping child (detail) accounts together. A detail account is a postable account and cannot have child accounts. A Bank Account is a detail account, but it differs in the respect that it can be reconciled
- The system will use the Account Number to determine where in the hierarchy the account should sit.
Example: If you enter 1234 as the Account Number then it will make it a child of the header account 1230. If there is no header account 1230, then it will attach it to the header account 1200 etc.
Example: “General Cheque Account” (Account Number 1-1200) is a child account of the header account “Current Assets” (Account Number 1-1000).

- In the example above, we have created a new Superannuation Account under the Account number 2-0034 (which makes it fall under the Liability category)
- Account Name: This is the unique name of the account
- Active Account: Tick if currently in use
- BSB and Banking Details: If you have selected the account type as Bank Account, another Tab will appear next to the general tab where you can enter the BSB Number and Bank details of the account.
Account Transactions Window
![]()
The Account Transactions window allows you to see what Journal Entries have been posted to the selected Account that you choose to view.
To view the transactions window, click once on the account you want to view so it is highlighted. In the example above the General Cheque Account has been selected. Next click on the Account Transactions button in the Top Toolbar.
The account transactions for the selected account will now be displayed in the main window.
Details Button
![]()
In the Top Toolbar there will be a Details button. By selecting a transaction in the main window and then clicking on the Details button, this will open a window showing the details of the selected transaction.
Depending on the type of transaction it will open a different window with its details.
- Invoice: Will open the Invoice details window
- Matter Receipt: Will open the Receipt details window
- Income: Will open the Receive Money details window
- Expense: Will open the Spend Money details window
In the example above a Expense transaction has been selected, and by clicking the details button the Update Spend Money window opens up, allowing you to view the details of that transaction.
Some of the windows that open for a chosen transaction are editable, while some are not. The windows that are editable are: Update Spend Money which is when an expense Transaction is selected and Update Receive Money which is when an Income transaction is selected.